
Anki has many amazing addons that make learning, creating and managing notes and decks easier. But in AnkiDroid due to platform restrictions those addons are not available. Anki is written in python and rust and easier to write addons also. But in AnkiDroid addons can be developed but those need to install as separate app.
Note: AnkiDroid only download js addons from npmjs and inject or perform action defined in index.js of addons. But hosting and managing of these addons is depend on addon developer and npmjs. AnkiDroid reads index.js from addons dir and perform action.
This page will be updated regularly. This repository created for testing pre alpha release of js addon support in AnkiDroid.
View
This is for pre alpha version of AnkiDroid so report issues, bugs, suggestions and feedback here.
Addons Type
This is implementation of using JavaScript as addons support. There are two implementation in progress.
1. Reviewer addons
It adds content to reviewer webview. It can be used to redesign the reviewer UI. These addons have full access to AnkiDroid JS API.
Examples
2. Note editor addons
It adds buttons to note editor toolbar. It can be used to create notes easily.
Examples
How to install addons?
To make it remain for longer time in AnkiDroid there are some specific standard set up. It may change with new ideas and suggestions.
- Download this AnkiDroid version from release page
- Visit npmjs:ankidroid-js-addon
- Select addons
- Copy
npm i ankidroid-js-addons...from npmjs addon page - Paste in AnkiDroid
AnkiDroid -> Addons -> Import Addons - Wait for installation to complete
- Change note type from options menu to view reviewer / note editor addons
- Turn on to use in reviewer / note editor
View demo for progress bar
View demo for mini cloze overlapper
How it works?
Reviewer Addons
The addons get downloaded from npmjs.com and installed in AnkiDroid. For enabled addons the content added to reviewer in Card Template.
View PR #8440 for more
-
Users will navigate to Addons Browser Activity
- There are four button in options menu
- Reviewer Addons
- Note editor Addons (Separate PR)
- Import Addons
- Get More Addons
-
When user click
Import AddonsIt will ask to pastenpm i ankidroid-js-addons...that is available on npm package on npmjs.com -
When user click
Downloadit will download the addons toAnkiDroid/addonsfolder - There are implementation for checking valid npm package
{
 "name": "ankidroid-js-addon-progress-bar",
 "version": "1.0.0",
 "author": "https://github.com/krmanik",
 "homepage": "https://github.com/krmanik/Anki-Custom-Card-Layout",
 "ankidroid_js_api": "0.0.1",
 "addon_type": "reviewer",
 "keywords": ["ankidroid-js-addon"]
}
If above found in package.json on npmjs registry then then it will download the package.json and get tarball url.
-
Here package with
.tgzextension will be downloaded tocachefolder and extracted then copied toAnkiDroid/addonsfolder -
The addons will be listed on the Addons Browser screen
-
Users have option to enable, update and delete addons.
-
When users enable the addons, the
index.jsfile of that addons will be added to card during review. The addons have full access to AnkiDroid JS API.
Demo of progress bar

Note editor addons
In Note editor buttons added for each and every enabled addons. When user click the buttons the function in Note editor read index.js in AnkiDroid/addons directory and call function AnkiJSFunction with data flow from AnkiDroid to JS Addons and JS addons to AnkiDroid. Here js-evaluator-for-android used to call js function inside Note editor.
Data flow from AnkiDroid to JS Addon
send deck name, model name, fields count, fields name and selected text in json format to js addon
Data flow from JS Addon to AnkiDroid
receive json format data with changed text and data that needs to be inserted to fields with index
View PR #8011 for more
How to create addons?
Reviewer addons
Install npmjs and create an account or manually paste the index.js and package.json in following directory structure
AnkiDroid
  - addons
      - ankidroid-js-addons...
           - package
                - index.js
                - package.json
 - collection.media
Create package.json file. Note: This is important to have following in package.json to distinguish from other npm package and to use inside AnkiDroid
View AnkiDroid:AddonsBrowser.java#L420-#L455
  "ankidroid_js_api": "0.0.1",
  "addon_type": "reviewer",
    "keywords": [
    "ankidroid-js-addon"
  ],
  "author": "Your Name",
  "homepage": "Your project website"
Example of progress bar
package.json of progress bar
{
  "name": "ankidroid-js-addon-progress-bar",
  "version": "1.0.5",
  "description": "Show progress bar in AnkiDroid, this package may not be used in node_modules. For using this addon view. https://github.com/ankidroid/Anki-Android/pull/7958",
  "main": "index.js",
  "ankidroid_js_api": "0.0.1",
  "addon_type": "reviewer",
  "scripts": {
    "test": "echo \"Error: no test specified\" && exit 1"
  },
  "repository": {
    "type": "git",
    "url": "git+https://github.com/krmanik/Anki-Custom-Card-Layout.git"
  },
  "keywords": [
    "ankidroid-js-addon"
  ],
  "author": "krmanik",
  "license": "MIT",
  "bugs": {
    "url": "https://github.com/krmanik/Anki-Custom-Card-Layout/issues"
  },
  "homepage": "https://github.com/krmanik/Anki-Custom-Card-Layout#readme"
}
Create index.js with content that you want to inject to reviewer
View AnkiDroid:AbstractFlashcardViewer.java#L2411-#L2480
index.js of progress bar
var progressDiv = document.createElement("div");
progressDiv.id = "h-progress";
progressDiv.className = "progress-1";
progressDiv.innerHTML = '<div class="progress-bar-1" id="h-bar"></div>';

// v0.5.2 - https://github.com/SimonLammer/anki-persistence/blob/62463a7f63e79ce12f7a622a8ca0beb4c1c5d556/script.js
if (void 0 === window.Persistence) { var _persistenceKey = "github.com/SimonLammer/anki-persistence/", _defaultKey = "_default"; if (window.Persistence_sessionStorage = function () { var e = !1; try { "object" == typeof window.sessionStorage && (e = !0, this.clear = function () { for (var e = 0; e < sessionStorage.length; e++) { var t = sessionStorage.key(e); 0 == t.indexOf(_persistenceKey) && (sessionStorage.removeItem(t), e--) } }, this.setItem = function (e, t) { void 0 == t && (t = e, e = _defaultKey), sessionStorage.setItem(_persistenceKey + e, JSON.stringify(t)) }, this.getItem = function (e) { return void 0 == e && (e = _defaultKey), JSON.parse(sessionStorage.getItem(_persistenceKey + e)) }, this.removeItem = function (e) { void 0 == e && (e = _defaultKey), sessionStorage.removeItem(_persistenceKey + e) }) } catch (e) { } this.isAvailable = function () { return e } }, window.Persistence_windowKey = function (e) { var t = window[e], i = !1; "object" == typeof t && (i = !0, this.clear = function () { t[_persistenceKey] = {} }, this.setItem = function (e, i) { void 0 == i && (i = e, e = _defaultKey), t[_persistenceKey][e] = i }, this.getItem = function (e) { return void 0 == e && (e = _defaultKey), t[_persistenceKey][e] || null }, this.removeItem = function (e) { void 0 == e && (e = _defaultKey), delete t[_persistenceKey][e] }, void 0 == t[_persistenceKey] && this.clear()), this.isAvailable = function () { return i } }, window.Persistence = new Persistence_sessionStorage, Persistence.isAvailable() || (window.Persistence = new Persistence_windowKey("py")), !Persistence.isAvailable()) { var titleStartIndex = window.location.toString().indexOf("title"), titleContentIndex = window.location.toString().indexOf("main", titleStartIndex); titleStartIndex > 0 && titleContentIndex > 0 && titleContentIndex - titleStartIndex < 10 && (window.Persistence = new Persistence_windowKey("qt")) } }

var UA = navigator.userAgent;

var isMobile = /Android/i.test(UA);
var isAndroidWebview = /wv/i.test(UA);

if (isMobile && isAndroidWebview) {
    progressBarInit();
} else {
    progressBarHide();
}

function progressBarHide() {
    document.getElementById("h-progress").style.display = "none";
    document.getElementById("h-bar").style.display = "none";
}

function progressBarInit() {
    document.body.insertBefore(progressDiv, document.body.firstChild);
    var cardCount = parseInt(AnkiDroidJS.ankiGetNewCardCount()) + parseInt(AnkiDroidJS.ankiGetLrnCardCount()) + parseInt(AnkiDroidJS.ankiGetRevCardCount());

    var totalCardCount = 1;
    if (Persistence.isAvailable()) {
        totalCardCount = Persistence.getItem("total");
        if (totalCardCount == null) {
            totalCardCount = cardCount;    // count set to total card count at first card, it will not change for current session
            Persistence.setItem("total", totalCardCount);
        }
    }

    // progress bar percentage
    var per = Math.trunc(100 - cardCount * 100 / totalCardCount) + "%";
    document.getElementById("h-bar").style.width = per;
}

var progressBarCSS = `
.progress-1 {
width: 100%;
border-radius: 2px;
background-color: #e6e6e6;
}

.progress-bar-1 {
height: 12px;
border-radius: 2px;
background-color: limegreen;
}
`;

var styleSheet = document.createElement("style");
styleSheet.type = "text/css";
styleSheet.innerText = progressBarCSS;
document.head.appendChild(styleSheet);
Note editor addons
Install npmjs and create an account or manually paste the index.js and package.json in following directory structure
 AnkiDroid
  - addons
      - ankidroid-js-addons...
           - package
                - index.js
                - package.json
 - collection.media
Create package.json file. Note: This is import to have following in package.json to distinguish from other npm package and use inside AnkiDroid
View AnkiDroid:AddonsBrowser.java#L420-#L455
View NoteEditor.java:listEnabledAddonsFromDir()
Change addon type to note_editor
Add addon_icon with single char as icon for button in note editor
  "ankidroid_js_api": "0.0.1",
  "addon_type": "note_editor",
  "addon_icon": "["
    "keywords": [
    "ankidroid-js-addon"
  ]
  "author": "Your Name"
  "homepage": "Your project website"
package.json of Mini Cloze Overlapper
{
  "name": "ankidroid-js-addon-cloze",
  "version": "1.0.0",
  "description": "Create cloze from list",
  "main": "index.js",
  "ankidroid_js_api": "0.0.1",
  "addon_type": "note_editor",
  "addon_icon": "[",
  "scripts": {
    "test": "echo \"Error: no test specified\" && exit 1"
  },
  "repository": {
    "type": "git",
    "url": "git+https://github.com/krmanik/Anki-Custom-Card-Layout.git"
  },
  "keywords": [
    "ankidroid-js-addon"
  ],
  "author": "Mani (krmanik)",
  "license": "MIT",
  "bugs": {
    "url": "https://github.com/krmanik/Anki-Custom-Card-Layout/issues"
  },
  "homepage": "https://github.com/krmanik/Anki-Custom-Card-Layout#readme"
}
Create index.js and write function with the name AnkiJSFunction and single parameter. Note: don’t change function name as this is the function that AnkiDroid call.
View NoteEditor.java:onAddonClick()
The parameter contains json format data of selected text, fields name, fields count, deck name and note type. Use this json data to change or insert data to Edit fields in Note editor.
AnkiDroid  -->  JS Addon
when AnkiJSFunction called then deck name, model name, fields count, fields name and selected text in json format passed to js addon


 {
   "noteType": "Basic",
   "deckName": "Default",
   "fieldsName": ["Front", "Back"],
   "fieldsCount": 2,
   "selectedText": "Some selected text..."
}
AnkiDroid  <--  JS Addon
Note editor receive json format data with changed text and data that needs to be inserted to fields with index


 {
  "changedText": "some changed text...",
  "addToFields": {
                 "0": "some text to field one",
                 "2": "some text to field two"
                 "3": "some text to field three"
                 },
  "changeOption": "replace"
}
Selected text change option
replace
append
clear
default
View NoteEditor.java:jsAddonParseResult()
Usage of above implementation in new AnkiDroid Cloze Overlapper Mini JS Addon
a) To test this addon first import this deck as it contains note type matching in index.js
b) Select ocloze-infi type then use this addon
index.js
function AnkiJSFunction(data) {

    var jsonData = JSON.parse(data);

    var selectedText = jsonData['selectedText'];

    var newJsonData = {};
    var fieldsData = {};

    if (jsonData['noteType'] == "ocloze-infi" && jsonData["fieldsCount"] == 26) {
        newJsonData["changedText"] = "";  // intentionally empty

        var list = selectedText.split("\n");

        var fullText = "";
        var len = list.length;
        var startField = 5;
        for (i = 0; i < len; i++) {
            var text = "";
            fullText += "<div></div>";
            for (j = 0; j < len; j++) {
                if (i == j) {
                    if (j > 0) {
                        text += "<div>" + list[j - 1] + "</div>";
                    }
                    text += "<div></div>";
                } else {
                    text += "<div>...</div>";
                }
            }
            fieldsData[startField] = text;
            startField++;
        }
        fieldsData[25] = fullText;

        newJsonData["addToFields"] = fieldsData;
    }

    return JSON.stringify(newJsonData);
}
Issues and bugs
This is for pre alpha version of AnkiDroid so report issues, bugs, suggestions and feedback here.
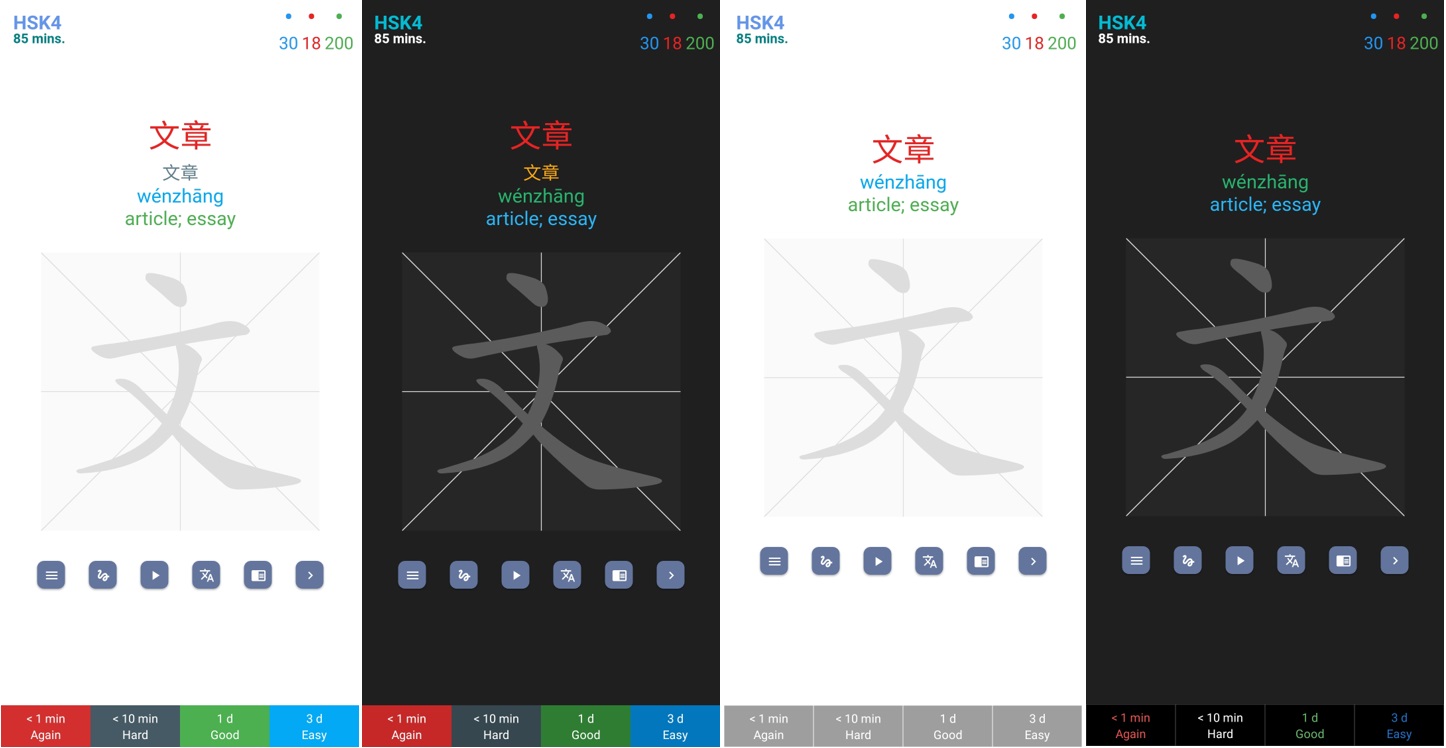 Anki-xiehanzi - Learn to read and write Mandarin